· Dustin Greenfield · Guitars · 10 min read
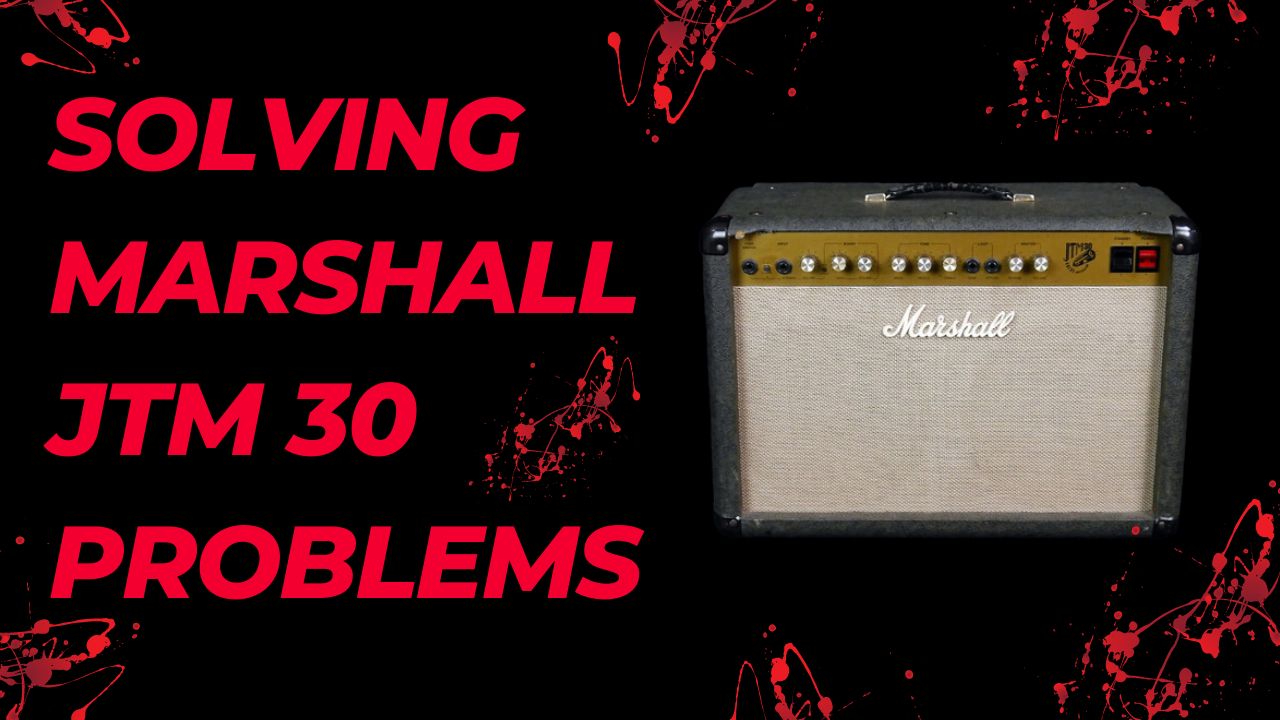
Solving Marshall JTM 30 Problems
Whether it's not turning on, producing no sound, or making unwanted buzzing noise, these issues can impede your creative flow and hinder your performance.

Whether it’s not turning on, producing no sound, or making unwanted buzzing noise, these issues can impede your creative flow and hinder your performance.
That’s why I’ve created this expert guide to help you troubleshoot and solve any problems you may be experiencing with your Marshall JTM 30. With my years of experience working with these amps, I’ve compiled a comprehensive troubleshooting guide with expert tips and solutions to get your amp performing at its best.
Key Takeaways
- 💡 It’s important to troubleshoot issues like no sound, overheating, or a non-functioning Marshall JTM 30 amp before seeking professional help.
- 🔧 Steps to fix buzzing noise in the amp include checking tubes and replacing if needed, isolating grounding issues, checking for faulty components, and reducing ambient noise.
- 💽 Replacing tubes in the Marshall JTM 30 amp can significantly improve sound quality/volume. Steps for doing this include purchasing the correct tube types, careful removal of old tubes, installing new ones, and testing the sound after replacement.
- 🌡 Preventing overheating of the Marshall JTM 30 amp involves proper ventilation, regular maintenance, and using an adequate power supply.
- 🚌 In case of a blown fuse, safely replacing it with the correct type of fuse can restore the amp’s operation. This process involves identifying the blown fuse, removing it, and installing a new one.
Also read Https://Styleofpop.Com/About Us
Marshall JTM 30 Won’t Turn On: Possible Solutions

If you’re experiencing the frustrating issue of your Marshall JTM 30 amp not turning on, there are a few possible solutions you can try before seeking professional assistance. Here are some troubleshooting steps you can take:
| Possible Cause | Solution |
|---|---|
| Power isn’t on or plugged in | Double-check the outlet and the power cable to ensure they’re properly connected and working |
| Fuse has blown | Check the fuse located in the power section of the amp. If it’s blown, replace it with the appropriate fuse type |
| Tube failure | If a tube has failed, replace it with a new one of the appropriate type and bias it accordingly. Make sure to turn off the amp and let it cool down before handling the tubes |
If none of these solutions work, it’s best to take your amp to a professional to avoid causing more damage or risking injury. However, with a bit of troubleshooting, you may be able to solve the problem and get your Marshall JTM 30 amp up and running again.
Also read Https://Styleofpop.Com/Best Vibrolux Speakers
No Sound from Marshall JTM 30: Troubleshooting Guide
If you’re experiencing a lack of sound from your Marshall JTM 30, don’t fret! There are a few steps you can take to troubleshoot the issue and get your amp sounding great again.
Step 1: Check the Cables
The first thing to check is your cables. Make sure that you have a proper cable connection between your guitar and the amp. Check if your guitar is working fine on another amp or system. If your cables are not working properly, replace them, and see if that solves the problem.
Step 2: Check the Settings
Make sure that all of your amp’s settings are properly set. Check that the volume is turned up, the tone settings are not muted or turned down too low. Sometimes it may seem like there’s no sound when there actually is, so make sure to check this first before proceeding to other solutions.
Step 3: Check the Tubes
The tubes in your Marshall JTM 30 could be the culprit for the lack of sound. Check to see if they are correctly installed and are functioning correctly. Tube failures, such as an open filament or cathode, can cause the amp to produce no sound or sound distorted.
Step 4: Check the Speakers
If the cables, settings, and tubes are all working properly, the issue might be the speakers. Check that the speakers are connected correctly, and that there is no damage to them. Sometimes, speakers can blow or become damaged, which can cause the amp to produce little or no sound.
By following these troubleshooting steps, you should be able to identify and resolve the issue of no sound from your Marshall JTM 30 amplifier. If these steps don’t work, you may need to seek the help of a professional amp technician.
Also read Https://Styleofpop.Com/How To Fit A Drum Kit In A Small Room An Easy Guide
Dealing with Buzzing Noise in Marshall JTM 30: Expert Tips
One of the most common issues with the Marshall JTM 30 amp is experiencing buzzing or humming noise. This unwanted sound can be frustrating, especially when playing at high volume or recording. In this section, I will provide expert tips and techniques to help reduce or eliminate buzzing noise and improve your amp’s overall performance.
Note: Before attempting any of the following tips, make sure to disconnect your amp from power and discharge any stored electrical energy to avoid any risk of injury.
1. Check and Replace Tubes
Buzzing noise in the JTM 30 amp is often related to worn-out tubes or mismatched pairs. Check and replace your tubes if any are damaged or not functioning correctly. When replacing tubes, make sure to use a matched set and follow the manufacturer’s specifications.
2. Isolate Grounding Issues
Grounding issues can cause buzzing noise in your Marshall JTM 30 amp. To isolate this issue, try using a ground lift adapter to remove any ground loop, or connect your amp to a different power outlet that isn’t shared with other electronics. You can also try using a low-noise power supply to reduce any interference with your amp’s grounding connection.
3. Check and Replace Faulty Components
Faulty components like capacitors and resistors can also cause buzzing noise in your Marshall JTM 30 amp. Check and replace any faulty components that may be causing the issue. For this, you may need to consult a qualified technician or a professional guitar amp repair shop.
4. Reduce Ambient Noise
Ambient noise from electrical appliances or other nearby electronics can also interfere with your amp’s performance and cause buzzing noise. Try turning off or moving away any nearby electronics or appliances and see if that reduces the buzzing noise.
By following these expert tips, you can effectively reduce or eliminate buzzing noise in your Marshall JTM 30 amp and improve its overall performance. If you’re still experiencing issues, consider consulting a qualified technician or a professional guitar amp repair shop for further assistance.
Also read Https://Styleofpop.Com/Drum Booth Size
Tube Replacement Guide for Marshall JTM 30 Amp
If you’re experiencing issues with the sound quality or volume of your Marshall JTM 30 amp, it may be time to replace the tubes. While this may seem like a daunting task, with the right tools and instructions, it can be done easily and safely.
Note: Before beginning, make sure your amp is unplugged and has had time to cool down.
Step 1: Get the Right Tubes
The first step to replacing tubes is to obtain the correct replacements. Your Marshall JTM 30 requires two EL84 tubes for the power section and three ECC83 tubes for the preamp section. Make sure to purchase tubes that match these specifications and are compatible with your amp.
Step 2: Remove the Old Tubes
Using a cloth or gloves to protect your hands, gently wiggle and pull the old tubes out of their sockets. Be careful not to damage the sockets or surrounding components. It may be helpful to label the tubes as they are removed to ensure they are replaced in the correct order.
Step 3: Insert the New Tubes
Carefully insert the new tubes into their sockets, pushing them in firmly but gently. Make sure they are securely seated in the sockets. If necessary, use the labels you made in step 2 to ensure the new tubes are inserted in the correct order.
Step 4: Power On and Test
Once you have replaced all the tubes, plug in your amp and power it on. Give it time to warm up and test the sound quality and volume. If everything sounds good, congratulations! You have successfully replaced the tubes in your Marshall JTM 30.
Note: If you are unsure about any aspect of tube replacement or are experiencing issues with your amp even after replacing the tubes, it may be best to consult a professional technician.
Also read Https://Styleofpop.Com/Evans G2 Clear Vs Remo Emperor
Overheating Issues: Solutions for Marshall JTM 30

When your Marshall JTM 30 amp overheats, it can not only damage the amp but also produce unwanted noise and decrease overall performance. In this section, I’ll provide some expert tips to help you prevent overheating and keep your amp at its best.
Proper ventilation
One of the main reasons that the Marshall JTM 30 amp overheats is due to inadequate ventilation. Make sure that the amp is positioned in an open area, away from walls or other obstructions. Good air flow is essential for keeping the amp cool. Also, avoid stacking other equipment on top of the amp, as this can prevent proper ventilation and cause overheating.
Maintenance
Regular maintenance is crucial for preventing overheating in the Marshall JTM 30 amp. You should clean the amp regularly, removing any dust or debris that may have accumulated. This is important as dust buildup can block air flow and lead to overheating. Also, keep an eye on the fans, ensuring that they are functioning properly and not making any unusual noises. If the fan is not working effectively, it may be time to replace it.
Power supply
The power supply can also contribute to overheating issues in the Marshall JTM 30 amp. Ensure that the power supply is adequate for the amp. Using a power supply with insufficient wattage can cause the amp to overheat and potentially cause permanent damage. If you are unsure about the power supply, consult the amp’s manual or contact a professional.
By following these tips, you can avoid overheating issues with your Marshall JTM 30 amp and ensure optimal performance. Remember, prevention is always better than cure!
Also read Https://Styleofpop.Com/Bass Drum Pedal Wont Bounce Back
Fuse Replacement for Marshall JTM 30: Step-by-Step Guide
If your Marshall JTM 30 amp is experiencing power issues, a blown fuse may be the culprit. Replacing a fuse may seem daunting, but with the right tools and precautions, it can be done safely and efficiently. Follow these step-by-step instructions for a successful fuse replacement.
Gather Your Materials
Before beginning the fuse replacement process, gather the necessary materials:
- New fuse of the appropriate type
- Screwdriver
- Plastic gloves (optional)
Identify the Fuse Location
Locate the fuse compartment on the back of the amplifier. It is a small rectangular box with a removable lid. Use a screwdriver to unscrew and remove the lid.
Remove the Blown Fuse
Identify the blown fuse by examining its appearance and using a multimeter to test its continuity. Once it has been identified, use a small pair of pliers to gently pull the fuse out of its housing.
Remember to wear plastic gloves or avoid touching the metal parts of the amp to prevent electric shock.
Replace with New Fuse
Insert the new fuse into the empty fuse slot, taking care to ensure it is securely seated.
Replace the Fuse Compartment Lid
Once the new fuse is in place, replace the lid on the fuse compartment and tighten its screws with a screwdriver.
With the new fuse in place, your Marshall JTM 30 amp should be operational once again. Remember to only use fuses of the appropriate type and size to prevent future damage to your amp.
Also read Https://Styleofpop.Com/Best Strings For Epiphone Ej 200sce
Conclusion
By following the expert tips and troubleshooting guide outlined in this article, you can address common problems such as the amp not turning on, no sound, buzzing noise, overheating, and fuse replacement.


